For many decades, drywall has been a fine solution against risk or inflammation, water absorption, and growth of mildew and mold in the house. Drywalls have made the construction of houses much easier.
But you need to be tricky while installing drywall around a shower. Because they cannot stand too much moisture. That is why you must know how to finish drywall around a shower.
Another problem with drywall besides a shower is the paper tape that is used to bind the joints of the drywall. Molds eat paper tapes and grow faster. But there is a solution to this problem.
In this article, we will show you how to do the finishing of drywall around a shower. You will also get some important tips about drywall around a shower in this article.
6 Steps To Finish Drywall Around A Shower
There are many solutions for installing drywall around a shower. Some put hot mud between the flange and the drywall. Some furs the studs before hanging the drywall.
But we will tell you about the best solution for finishing drywall around a shower. This professional solution will save the drywalls as long as the house stands. Here are the 6 steps you have to take to finish your drywall around a shower using a shower bead:
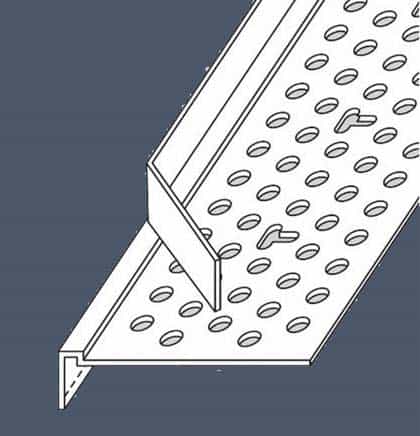
Step 1: Test The Shower Bead
Shower beads are what professionals use to finish drywall around a shower. Before installing a shower bed, you should check if the shower bead lays flat on the wall or not.
To do the test, you have to cut a small piece of the bead and lay it against the wall. Tear off a strip of the support leg if the bead does not fit flat in the wall.
Step 2: Cut The Bead To Fit The Drywall
Now you have to cut the shower bead exactly in the measurement of the length of the drywall. You can use a regular hacksaw to cut the bead.
Step 3: Set The Bead Into The Drywall
After cutting the bead, spray it with Trim-Tex adhesive spray. Without any delay press the bead into the drywall. Put the legs into place making sure they are in position.
Step 4: Staple The Leg
At this point, you have to staple (½ inch staples) in every six inches of the mud leg. These staples will be the final support of the shower bead. So be careful to do the stapling keeping the same distance in between.
Step 5: Mud & Sand
Now you have to prepare the shower bead by mudding and sanding it properly. After mudding and sanding the bead, you can pull out the tear-off strip of the bead.
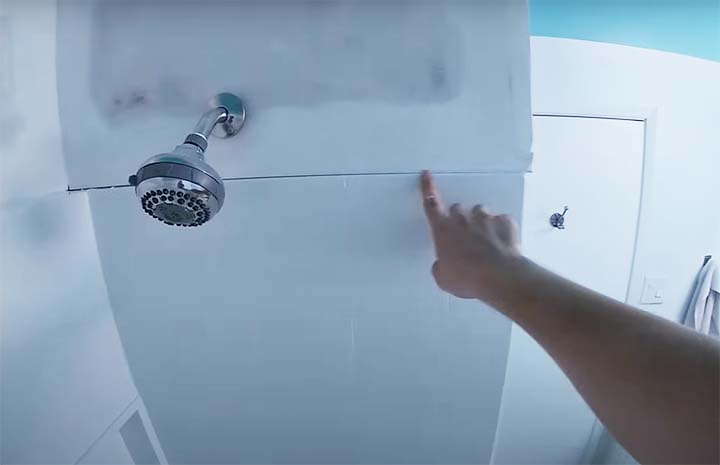
Step 6: Caulk The Gap
Now the drywall looks completely installed around the shower. But there is one thing left to do. That is, caulking the gap between the shower and the shower bead. You need to caulk the gap to prevent the transfer of moisture from the shower to the shower bead.
6 Advantages Of Using Shower Bead To Finish Drywall Around A Shower:
Now we will explain why using a shower bead is the best way to do the finishing of drywall around a shower.
1. Uses Less Drywall Compound:
One of the biggest advantages of using shower beads is, they do not rely on drywall compounds to do the job. If you fill the gap between the shower wall and the drywall with mud a lot of the compounds of the drywall would be consumed by the mud.
2. Less Messy:
Any other option other than shower beads creates a mess around the shower. But the tear-off strips of a shower bead save the shower from a lot of mess during the installation.
3. No Paper Tape:
While installing the shower bead, you do not need to use any paper tape. This reduces the risk of growing molds in the wall to a good extent. As you know, the growth of mildew and molds destroys a wall in a short period.
4. No Screws:
Shower beads do not need screws to fit in the wall. The long mud legs can easily go across the gap between the shower flange and the drywall. Besides, staples are used to get hold of the beads. It saves your money and any kind of drill.
5. Saves Time:
Using a shower bead to finish the drywall around your shower will take less time than all the other options of doing the job. In today’s busy world, it means a lot to many people.
6. More Durable:
Shower beads are manufactured using PVC. It means it will never get rusty and will never host any molds, no matter how moist it remains.
Commonly Asked Questions About Finishing Drywall Around Shower
How Do You Waterproof A Drywall Around A Shower?
A waterproofing primer is the best solution to make a drywall waterproof, which is right beside the shower. There are two basic types of waterproofing primes on the market. One is based on latex and the other is based on oil. Their main purpose is to prevent the surface from molds and mildews.
Is There Any Difference Between Finishing Drywall Around A Shower And A Tub?
There is a little difference between finishing drywall around a shower and a bathtub. The process of finishing the drywall around a shower and a tub is the same. But you can omit using shower beads at the top part of the drywall when you are installing it around a tub. The difference in height of the water source is the reason behind this.
What Kind Of Drywall Do You Use In A Shower?
There are many kinds of drywalls in the market, which can be used around a shower. But among them, two types of drywall are the most popular.
The first one is the Blue Board drywall. They are very much affordable and available. Their installation process is also easy.
The other type of popular drywall is called Green drywall. This type of drywall is very much capable of dealing with moisture. They are claimed to be mold-resistant. Even the joint compounds of the drywall are moisture-resistant as well.
What Should You Put Behind Shower Walls?
The gap behind the shower wall should be filled with an air blocker of cement backer board, sealed drywall, and rigid insulating foam.
You cannot give it less importance, because the overall hygiene of your house depends on the lawyers behind the shower wall. If any of the mentioned protection is not there, the chances of growing mold increase highly. As you know, the presence of mold in a house is very harmful to the human body.
Can You Tile Over The Drywall In A Shower?
You cannot tile the drywall around a shower. If the drywall is tiled, it will sag or crumble. Eventually, those crumbles will make cracks in the tiles and even make them come loose. You can tile drywall when they are installed in a kitchen or any other place in the house, but not around a shower.
Bottom Line:
Finishing the drywall around a shower is a serious task. You cannot do any experiment on this. Because it may compromise the hygiene level of your house. If you follow the steps described in this article meticulously, you will not need to worry about the shower wall for a long period.
I am James Martin, An professional plumber with more than 16 years of experience. The main purpose of my writing is to share my experiences of helping others. Be with me and explore bathroom plumbing, installation, cleanness ideas, and many more.