One primary reason you need to consider many factors when building your bathroom is that it is one of the essential parts of your home. The bathroom is one of the sensitive parts of your home, so you need to build it properly and choose its facilities carefully.
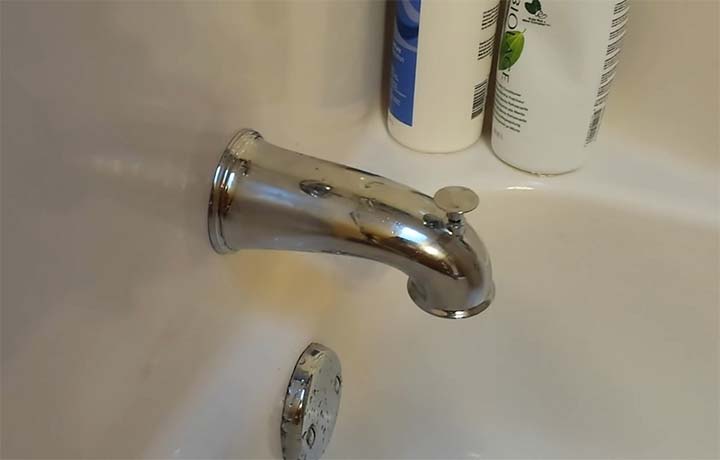
Wall dampening is one of the common issues in the bathroom. To avoid this issue, you need to install a Hardie backer board around your bathtub.
The walls around the bathtub are usually exposed to water almost every time, and you need to design the wall with water-resistant and durable materials like the Hardie backer board.
Hiring a plumber to handle this installation process will cost you more than handling it by yourself. If you need to learn how to install a Hardie backer board around the bathtub, this article is for you.
What Is The Function Of The Hardiebacker Board?
The primary function of the Hardie backer board is to prevent the walls around the bathtub from getting soaked.
The Hardie backer board can prevent the dampening of a wall because it is:
- Strong
- Durable
- Water-resistant
Installing the Hardiebacker Board
The installation process is not very easy, and at the same time, it is not too difficult. But after installing it, you will see that the pleasing and long-lasting results are worth the investment.
Pros:
- Last for an extended period
- The outcome looks beautiful
- It helps to prevent dampening that may later become algae and bacteria-prone.
Cons:
- It requires more effort.
- The process also requires more elbow grease.
What is The Equipment Needed For Installing Hardiebacker Board?
Some projects are delayed because the equipment needed to carry out some particular tasks is not available. So, therefore, you need to prepare the necessary equipment/tools that you will need before you start the project.
Having the necessary tools and equipment near you will help you execute the project with ease and finish it quickly without any delay.
If you are installing the board by yourself, you need to be familiar with the necessary tools you will need for the project.
1. Caulk and Caulk Gun
Caulk is made of latex or silicone, and it is one of the essential pieces of equipment needed for the project. Get enough caulk at bay before you commence the project to avoid unnecessary delay.
Uses:
It is used for sealing gaps between glass, tiles, metals, etc.
2. Drilling Machine
Drilling Machines are in various shapes and sizes, and their mode of operation also differs from each other. The size project you want to do will determine the size of the drilling machine that you need.
To avoid any form of accident, it is advisable to go for a cordless one.
Uses:
It is primarily used for putting holes on any surface, e.g., a wall.
3. Teflon Coated Screws
You need to use this type of screws because they don’t get rusted easily. Tiles can be easily placed without stress by attaching the board to the wall with Teflon-coated screws.
4. Notched Trowel
The notched trowel is very important, like every other piece of equipment, in different sizes.
Uses:
- It is used for adhesive on the board.
- It is used for smoothening the adhesive on the board before placing the tiles on it.
5. Adhesive
You need to apply adhesive to the board before attaching the tiles to it. The adhesive helps to hold the tile firmly to the board and also makes it last longer.
6. Tile Backer
This is one of the essential materials you will need for installing a Hardie backer board around your bathtub. It is the base needed for applying cement and also putting tiles on the board.
Other tools needed for the project are: a hammer, jigsaw, utility knife, mesh tape, metal putty knife, and carbide-grit hole saw.
Determining The Layout Of The Hardiebacker Boards
Some of the things that you need to put into consideration when you want to choose a layout for the Hardie backer cement board are:
- Arrange the board in a pattern that will make it appealing and attractive. A staggered pattern makes it more appealing.
- It would help if you avoided the corners meeting at a single point. A weak point will be created if the corners meet at a single point.
- You can choose whether to install the boards horizontally or vertically but go for the one that will produce a perfect aesthetic look.
NOTE:
- Make sure that the wall is arid before you start the installation process.
- The board must be a bit higher than the lip of your bathtub.
- The framing must be done correctly or else, and it will cause complications later.
- To choose the best Layout for your boards, you also need to consider the size and shape of the bathroom.
Installing The Hardiebacker Board Around The Bathtub
After making the necessary preparation, the next thing you need to do is start the installation process. Before starting the installation process, you need first to understand how to install the Hardie backer board around the bathtub.
The steps below will guide you through the installation process.
Step 1:
This step is crucial because you may need to restart the process from the beginning if you make any mistakes. So, it would help if you were very careful.
- This step involves taking accurate measurements of your bathtub and the Hardie backer board. You may need to take the measurements at least twice to ensure that they are accurate.
- Ensure that the board should be placed above the tub (at least half-inch above the bathtub). This will prevent water leakage onto the board.
- Prevent debris and dust from entering the tub by covering the tub
Step 2:
After taking the measurements, the next thing you need to do is to:
- Install the cement board against the wall
- Keep the board at least half-inch above the wall by inserting half-inch spacers.
- Screw the board to the wall using the cement board screws. The screws must be inserted straight, and they must flush with the cement board.
Step 3:
- Create holes in the walls by using the drilling machine.
- Attach backer boards onto the wall and screw it with Teflon coated screw.
- Repeat the same process until you attach all the backer boards
- Cut out different shapes using the jigsaw, and drill holes with the carbide-grit hole saw.
Step 4:
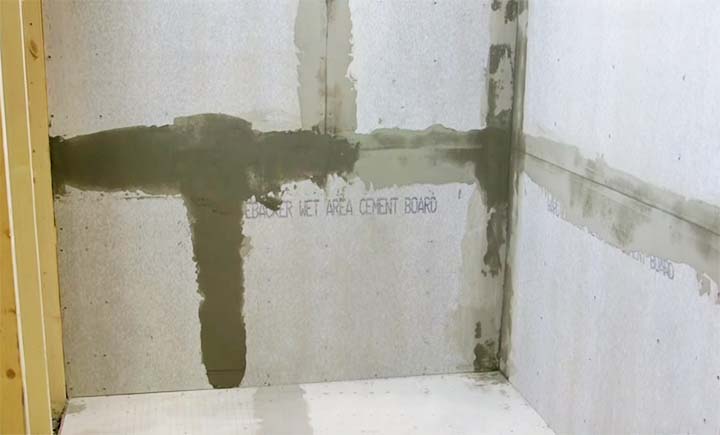
- Apply mesh tapes or caulk to the gaps between the boards.
- Strengthen the seams by applying thin-set mortar to them.
- Applying the thin-set mortar on the Hardie backer boards will help to fix the seams correctly.
Step 5:
The next you need to do after inserting all the backer boards is to:
- Apply tile backer on the backer boards using the notched trowel
- Smoothen the surface with the notched trowel
Step 6:
- Seams should be covered with mesh tape.
- Smoothen the tape and cut off the excess tape at the end
- Prepare and spread thin-set mortar on applied seams by using the metal putty knife.
After completing the six steps explained above, you can now add the tiles to your Hardie backer board.
Ensure that you clean the backer board surface properly before attaching the tiles. If you don’t clean it correctly, the tiles will fall off within a short period.
Frequently Asked Questions (FAQs)
Which side of the Hardie backer board should go up?
The smooth or rough side is acceptable, but professionals recommend the smooth side.
How do you cut the Hardie backer board?
You can cut the board with a utility knife, carbide-tipped scoring knife, or cutting shears.
Conclusion
Water is one of the essential things used consistently in the bathroom, and wall dampening may occur if the wall is soaked with water. One significant way to avoid damp walls is by installing a Hardie backer board on the wall.
You can handle the project by yourself or hire a professional to handle it for you. One of the advantages of handling it yourself is that the cost of installation will be reduced.
Installing the Hardie backer board might look complex for a novice because it is a job that needs precision. But, you can quickly learn how to install a Hardie backer board around the bathtub by yourself when you study this article carefully.
I am James Martin, An professional plumber with more than 16 years of experience. The main purpose of my writing is to share my experiences of helping others. Be with me and explore bathroom plumbing, installation, cleanness ideas, and many more.