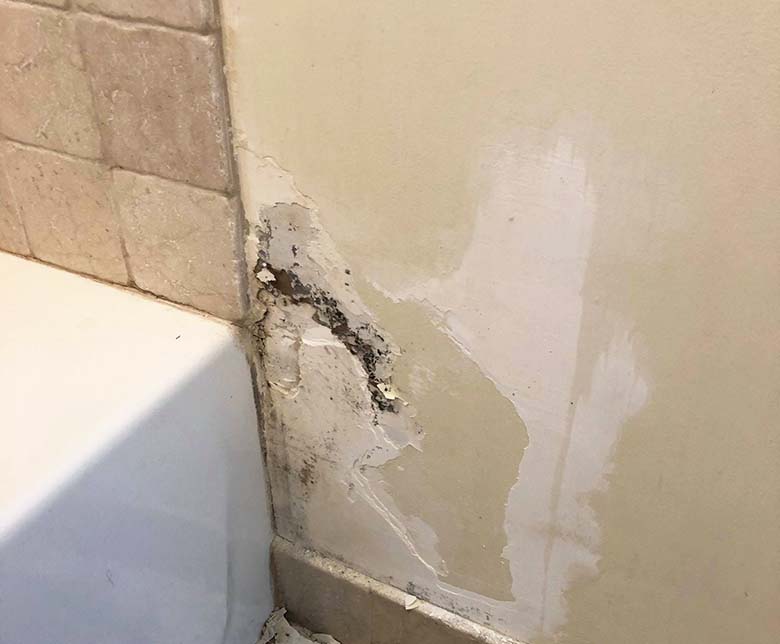
Did you see the drywall next to the shower getting wet? Chances are high that you have experienced this problem at once in your lifetime, at least. This is the frequency of the drywall getting wet right next to the shower space.
As the drywall gets wet, it can scare the sheet out of you. It happens as shower space will dampen the adjacent wall continuously. People at home may use the same shower space multiple times daily, quickly dampening the drywall.
If you don’t fix the wet drywall, it can reach the structural design inside the wall. So, the dampness will hurt the iron or steel inside it. You, thus, fix the drywalls ASAP. You must remove the damaged or wet drywall stud. Then, replace it with a new one and apply multiple coats of drywall mud.
You can also prevent the drywall from getting wet using a dehumidifier. There are other ways too that we will discuss here-after.
What Happens If Water Gets Behind Shower Wall?
You might wonder what drywall damage can do to a shower space. At first glance, it only appears as normal dampness and nothing else. If you think so, you are living in a fool’s world. A dampened drywall can wreak havoc on the bathroom wall.
As the drywalls remain wet for days, it keeps getting weaker. If you don’t fix the damp drywall, it will start falling from the space. So, you will need t go through costly repairs. Moreover, not repairing the drywall timely might damage the home’s structure.
The water will reach the steel structure inside the wall. So, it might rust and start corroding. As it happens, the main structure might become so damaged that it will become unrepairable.
Besides the structural damage, the wet drywall in the shower will face mold and mildew growth. It also triggers bacterial and viral infestation. So, it is harmful to the shower space. You will have a hard time maintaining hygiene there.
Lastly, wet drywall with mold growth hurts the appearance of the bathroom. If guests visit it, your reputation will be at stake.
How To Repair Water-Damaged Shower Walls:
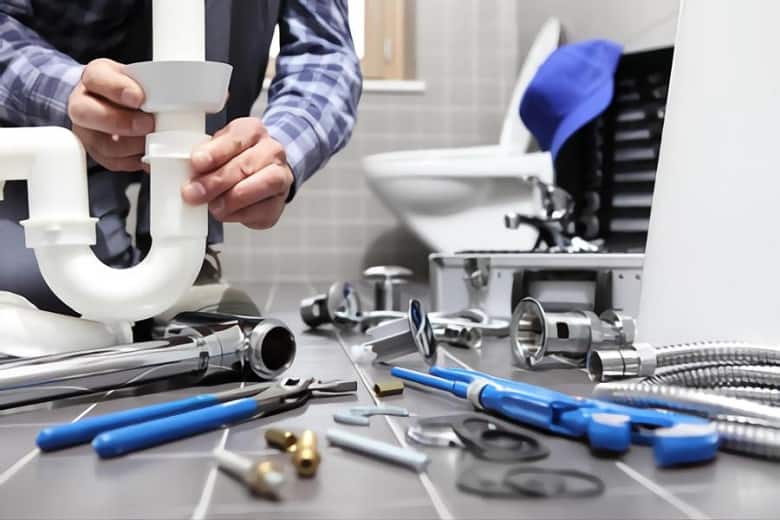
When you see the shower wall getting damaged due to water, you should fix it ASAP. However, fixing the wet shower wall can be challenging. You will need to grind hard and have optimal plumbing and carpenter skills to work with the dampened shower drywall.
Step 1: Gather the tools and items
First, you should enlist the tools and items required to fix the drywall. After that, collect these things and keep them close to you. It will be valuable to repair the wall faster and better.
First, collect the tools with which you will work:
- Pry bar
- Hammer
- A stud finder and measuring tape
- Level and pencil
- Carpenter’s square and drill
- Trim
- Miter saw
- Finish nail gun and finishing nails
Besides, you will need the following items too:
- Drywall
- Drywall screws
- Drywall tape
- Drywall mud and mud pan
- Drywall taping knife and sanding sheet
Did you arrange everything? If yes, let’s focus on the fixing steps.
Step 2: Removing studs and access the next drywall
Look along the damaged drywall and remove its base first. Also, look at the trim and remove the nails from it. You should inspect the trim to see if it is reusable. You may reuse it or keep it aside if it is in good condition.
After that, check the area to find an undamaged stud. It should be close to the damaged drywall stud so you can work with it accurately and efficiently. Draw a vertical line along the stud’s edge with the pencil or marker. The horizontal line should be towards the bathtub. Also, it needs to be above the wet drywall for easy visibility and repair.
The horizontal and vertical lines will create a square. The damaged drywall will be inside this square that you have to fix.
Step 3: Removing the damaged drywall completely
Use the knife to cut along the horizontal and vertical lines. Use firm pressure so that the knife goes past the drywall completely. After cutting through the lines, tap firmly over the damaged drywall. It will start breaking into pieces and make it easier for you to cut off and remove them.
After cutting the drywall into sections:
- Pry them off.
- Remove the nails and screws from the frame.
- As you do it, ensure that the nearest stud has ½ inches edge left next to the framing.
Step 4: Check for the rotted frame
When you have pried off the wet drywall, inspect the frame for any damages and rotting. Sometimes, the bottom wall plate and studs may be damaged. You will need 2 by 4 and 2 by 6 studs to replace the damaged studs.
When you work with the damaged framing, you must also remove a few adjacent drywalls.
Step 5: Prepare the new drywalls
Now, it’s time you prepare the new drywalls to install them on the damaged section. It would help if you cut the studs according to their size requirement, trim them smoothly, and connect them closely.
- Use the measuring tape to calculate the drywall length and width carefully. Now cut it with the miter saw.
- You should use waterproof drywalls to prevent them from getting wet in the future. Once you have cut the drywall properly, secure it with the screws.
- You should also maintain an accurate thickness of the drywall. Mostly, drywalls have ½ inches and 5/8 inches thickness. Check the existing drywall thickness and get the new one accordingly.
Step 6: Applying drywall mud and drywall tape
First, look over the screw holes, nuts, and seams. Apply drywall mud on these spots to fill up any gaps. Now, apply the drywall tape over the mud so it rests on the mud tightly. Before the drywall mud and tape set, squeeze the tape and mud. It will squeeze out excess mud. Then, use a utility knife to remove the additional mud and tape from the edges.
Once you have smoothened the edges, apply the 2nd coat of mud over the tape. When it dries, sand it with sandpaper for proper smoothening. You will need to apply two more coatings of the drywall mud and smoothen it with larger knives.
Step 7: Finish the repair work
Finally, you must install the new stud base and shoe trim for the framing. Secure the nails with a finishing nail gun. Also, look closely around the drywall and shower space. There will be a slight gap that you need to fill and secure with silicone.
You must also paint the drywall with a similar color in your bathroom. Otherwise, the repair work will look ugly. For painting the drywall, use smoother and smaller brushes and rollers. It will help you achieve a better finish.
How to Prevent Water Damage on Wall Next To Shower:
Water damage behind the shower wall is unpleasant. Plus, it could be better for the health of your building structure. So, instead of waiting for the drywall to get damaged and repaired, you should prevent it. But how do you prevent shower drywalls from damaging?
Use dehumidifier:
Bathrooms are one of the most moisturized spaces in your home, right next to the basement and garage. The additional humidity will cause damage to the drywall slowly. So, you should stop the humidity growth inside the bathroom.
Hence, it would help if you used a small, portable dehumidifier in the bathroom. It will remove excess humidity and keep the bathroom drier. So, drywall will become less likely to get damaged with higher moisture.
Use waterproof drywall:
The best way to protect bathroom and shower walls from water damage is to use waterproof drywall. As you use waterproof drywalls, water won’t penetrate them. Hence, the drywalls will remain risk-free from damage. It prolongs your bathroom’s lifespan and will reduce maintenance costs. You will often see waterproof drywalls in shower and bathtub spaces too.
Use shellac or oil-based primer:
Older homes may have conventional drywalls without waterproofing capacity. So, replacing all of them with waterproof ones will be costly. Instead, you can apply primer over the old drywalls. As you use oil or shellac-based primer over the drywall, it creates an artificial covering.
Water will fail to penetrate the oil-based primer. So, the drywall will remain safe, mostly.
Apply laminate or acrylic walls:
These days, laminated drywalls are popular. They come in different colors, textures, and patterns. So, it helps you decorate the bathroom and prevents the walls from water damage simultaneously. You may choose acrylic walls.
Like the laminated ones, they are also available in different textures and patterns. Finally, you can choose tiles and gypsum wall panels. They will secure the shower and bathtub space from any water damage.
These are the ways to prevent the drywall from getting wet near the shower space. Always remember that preventing them from damage is easier than repairing them. Nonetheless, you can follow our seven steps if you need to fix the drywall next shower getting wet and damaged.
I am James Martin, An professional plumber with more than 16 years of experience. The main purpose of my writing is to share my experiences of helping others. Be with me and explore bathroom plumbing, installation, cleanness ideas, and many more.