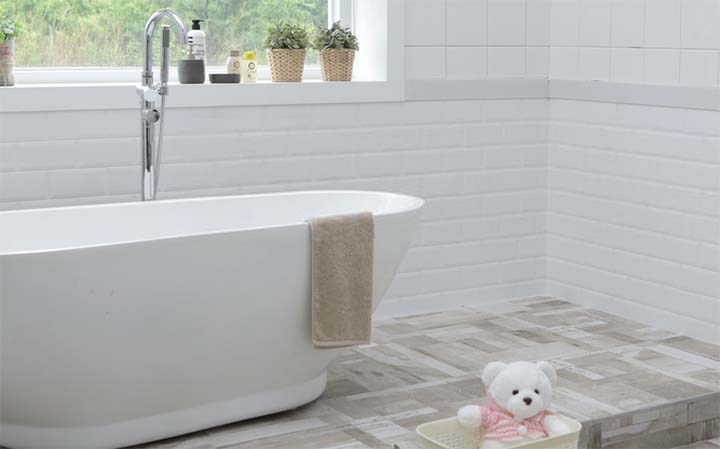
We all want to create the most beautiful ambiance in our bathroom and thus, take care of the smallest details. From the bathtub décor to floor tiles, everything contributes to the aesthetics and relaxation inside the bathroom.
Hence, installing the floor tiles and bathtub properly is of immense importance to any bathroom. But it may not be as good as we always want, especially when the gap between the bathroom floor and tub is too much. In fact, the gap between tub and floor tile plays a major role in how the bathroom looks.
Also, the gap creates space for water to flow slowly but surely into the sinkhole to keep the floor dry and safe. However, when the gap between the floor tile and bathtub is too wide, it might ruin the look of your beautiful bathroom in seconds. On top of it, a wider gap will result in water accumulation only to lessen the durability of the floor.
Thus, you must know the ideal gap between the floor tile and the bathtub. Also, you must know how to fill the gap between tub and tile if it is too wide or more than the standard measurements.
What Is The Ideal Gap Between Tub And Floor Tile?
Although we are discussing the ideal gap between the tiles on the floor and bathtub, there shouldn’t be any gap. But due to human errors and technical reasons, we will often see the gap between the tiles and bathtub.
Thus, the main idea is to minimize the gap as much as possible. For instance, any gap less than 1/10 or 0.10-inch is considered a good standard for the bathtub and floor tiles. Although you could still try to minimize or eliminate the tiny gap, it is, at least, acceptable.
But problems start when the gap starts getting bigger. For instance, if the gap is more than 1/8 or 0.125-inch, it might be a serious concerning issue. At this moment, you must try to eliminate or fill in the gap ASAP.
And to fill up the gap between the tiles of the floor and bathtub, you will need a bit of tiling knowledge. You can fill up the gap with caulk in most cases, but it’s rather a temporary solution. Nonetheless, a combo strong adhesive and caulk would still eliminate the gap for an extended period.
For larger gaps and holes, you may prefer floor sealant. Also, these sealants are longer-lasting the regular caulks.
How to Fill Gap between Tub and Tile
When you see a gap or cracks between the floor tile and bathtub, it could be heart-wrenching. And you would immediately want to fill in the gap. While reinstalling the floor tiles is a great solution, it is pretty time-consuming.
On top of it, replacing the expensive tiles is costlier than you have ever imagined. Thus, we looked for a pocket-friendly idea to minimize the floor tile and tub gap for the sake of your bathroom’s aesthetics. The process is easier than you anticipate and takes only a few minutes to accomplish.
For this, you will need:
- A measuring tape
- Caulk and caulk gun
- Water filled bucket
- Toilet paper
- A putty knife
When the gap between the floor tile and your bathtub is too wide, it holds more water, and it could eventually ruin your bathroom sooner or later. Also, it creates small blemishes on the floor, which are an eyesore to everyone.
Thus, gather all the items we mentioned above and start filling in the gap to keep the aesthetics of your bathtub, bathroom floor, and tiles intact.
Step 1: Measuring the Gap
We will use caulk to fill up the gap between the floor tile and its adjacent bathtub. If the gap is too wide, the caulk won’t be able to handle it. Then, you may need to use waterproof floor sealant and eliminate the gap.
Thus, we will start by measuring the gap between the tiles on the floor and bathtub edges. Also, knowing the actual gap will help you choose the right caulk quickly to accomplish the job. All you need to do is measure the distance multiple times by accurately putting it right between the gaps. We insist on measuring the distance multiple times to get the most accurate readings.
Once you have checked the distance between the tiles and tub, record it in your smartphone’s notepad or save it somewhere.
Step 2: Choosing the Right Caulk
Water is a 2-in-1 element. At one point, it saves our life, and on the other point, it destroys everything that comes in its way. The latter is true for bathroom floors. When too much water accumulates in the floor tiles and bathtub gap, it will ruin the joints and ultimately ruin the bathroom look.
The good news is that you can get rid of the problem using caulks. It is an easy and quick solution to the problem and doesn’t need much plumbing and knowledge on tiles either.
But for this, you need to choose the right caulk. And to choose the right caulk, the reading of the distance between the floor and bathtub is crucial. Luckily, we have saved the information from the first step, haven’t we?
- You can fill the gaps with regular caulks if the gap is less than ¼ or 0.25-inch.
- If the distance measurement is 1/8-inch or around it, we suggest you use sanded caulk.
After you have chosen the right type of caulk, let’s focus on its properties. But before that, we remind you that you are working on your washroom, where water is the primary element. And sadly, water is notoriously known for its destructive power.
So, the caulk you choose should withstand the regular and daily abuses of water for a long-lasting service. The best way to prevent the caulks from wearing out due to water flow is to choose waterproof caulks. Also, you may consider applying adhesive on the gap before putting in the caulk as a filler between the gap.
Step 3: Preparing the Caulk Gun
You can’t just apply the caulk with bare hands. You will need to apply it using a caulk gun. The caulk gun preparation steps include:
- Firstly, you must cut the tip of the gun’s nozzle tube. Most caulk guns have a spout cutter for the job. If your caulk gun model doesn’t have one, use a utility or putty knife to cut off the tip of the nozzle’s tube of the caulk gun.
- For accurate and sharp-cutting results, hold the knife at a 45-degree handle with the nozzle tube. You may wear a glove to protect your hands from the sharp knife or be aware of where your fingers are for safety reasons.
- For cutting the tip of the tube using the spout cutter, place the tube between the cutter’s teeth. Then, forcefully squeeze it to cut the tip of the nozzle tube.
- Then, create a small hole in the mouth of the nozzle tube. The mouth works as a way for the caulk to come out from the tube. So, ensure that it is neither too big or nor too small. Or, you will need to use a second tube.
- Find the cradle of the caulk gun and inside the caulk-filled tube into the cradle. Now, you are all set to use the caulk gun.
Step 4: Applying the Caulk
Before you start applying the caulk, make sure the floor tile and tile gap are dry entirely. If it is wet, the caulk won’t stick to the surface and will wear out sooner than expected.
- Check the gap and use a clean piece of cloth to dry out the water, if need be. Even if there’s no water, cleaning the gap with a cloth helps the caulk stick better.
- After that, position the caulk gun properly at a 45-degree angle with the floor. Press the trigger to start the gun and allow it to heat up for a few seconds.
- When the gun is heated up, the caulk will start smoothly coming out from the gun through the tube. Hold your hand firmly and steadily while applying the caulk in the gap.
- Depending on the speed of the caulk coming through the tube, you may need to slow down or speed up the process. For speeding up the flow, press the trigger. And for slowing it down, release the pressure from the trigger only slightly.
Step 5: Smoothening the Caulk and Finish Up the Job
When you apply the caulk using the gun, it should be smooth. But, at times, you may pour too much caulk in a spot. Thankfully, you can quickly remove the additional caulk before it dries up inside the gap. For this, use a putty knife to smoothen up the applied caulk.
Also, you can run your hands or fingers across the applied caulk, much like sandpaper. But, it makes your hand dirty and might hurt the skin. So, we recommend using the putty knife. When you are satisfied with the smooth work, allow the caulk to dry.
Ideally, 24-hours of time should be enough to dry up the caulk. You should use another washroom to prevent water spillage on the newly applied caulk on the gap during this period.
How to Fix Large Gap Between Tub And Floor
At times, the gap can be larger such as more than 0.25 inches. Applying the caulk won’t work for much larger gaps. Also, most floor tiles have grout that must be sealed to ensure the long-lasting service of the tiles.
Depending on the type of tiles your bathroom floor has, you will need to find the right sealant accordingly. For instance:
- Apply penetrating sealer for the porous tiles
- And for non-porous tiles, apply regular sealants.
Thus, look at your tiles closely to know their type. Or, you could ask the plumber or tile mechanic. Then, choose the right sealant quickly. You can apply the sealant easily with a sponge. Before you start applying the sealant, clean off the tiles with a commercial cleanser. Then, use a fresh and clean sponge to fill the gap using the sealant.
Allow the sealant to dry out properly. After that, you can use the caulk to eliminate the gaps of the tile and bathtub entirely.
Final Words
A bathroom and bathtub is a place of comfort and relaxation. Thus, its ambiance and look truly matter to everyone. But the beautiful look of your bathroom will ruin if it has a gap between the tub and floor tile. Thankfully, you can fill up the gap with the right caulk and sealant within a few minutes. However, don’t use the bathroom for the next 24 to 36-hours to allow the sealant and caulk to dry properly. It will ensure long-lasting service.
I am James Martin, An professional plumber with more than 16 years of experience. The main purpose of my writing is to share my experiences of helping others. Be with me and explore bathroom plumbing, installation, cleanness ideas, and many more.


you are truly a excellent webmaster. The web site loading velocity is amazing. It seems that you are doing any unique trick. Furthermore, The contents are masterpiece. you have done a wonderful job in this subject!
Thank you so much.