A toilet flange is an integral part of the toilet that holds the toilet bowl against the bathroom floor and seals the floor against the drain waste pipe. Thus, it secures the toilet bowl and prevents the floor from filths. However, the toilet flange may catch rust with age and rapidly wear out.
At this moment, you need to replace it with a newer one to secure the toilet bowl. Thus, we will show you how to replace a rusted toilet flange before it completely breaks down, resulting in a total massacre in the bathroom.
Usually, multiple bolts will hold the toilet flange with the bathroom subflooring. You need to remove them to replace the toilet flange safely and remodel the subfloor.
How to Replace a Rusted Toilet Flange
Toilet flange can be made of plastic or metal. Multiple screws and bolts will hold this metal or plastic toilet component with the bathroom subfloor. Usually, the metal toilet flange is more prone to rust than the plastic ones due to moisture build-up at the bottom of the toilet and around the bathroom floor.
Here, you will learn the DIY suggestions for how to remove a rusted toilet flange bolt to be able to remove and replace the damaged toilet flange quickly and conveniently.
Step 1: Removing the toilet bowl
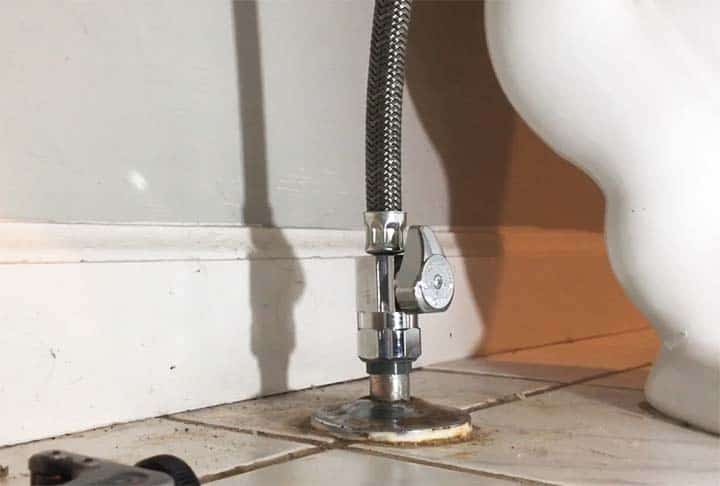
First off, ensure that you have turned off the main water line of the toilet. It will not only stop any filthy massacre in the bathroom but also allow you to look at the flange ring. When the flange ring is damaged, you must replace the flange. Or else, you may consider repairing the rusted toilet flange and working with it for a few more months.
Place an old towel or newspaper next to the toilet flange on the bathroom floor. After that, flush off the toilet to empty the tank and use a wrench to disconnect it from the water supply hose. Now, you should look at the bottom of the toilet where 2 bolts hold it with the floor. At times, they may be covered with plastic caps; remove them if it has any caps.
Now, remove the bolts using a screwdriver and place the toilet carefully on the adjacent towel or newspaper. If the bolts have got rust, apply a cleaner and brush them off to remove the rust and then, pry them off from the toilet bolt safely.
Step 2: Removing the old and rusted toilet flange
When you have placed the toilet bowl securely on the towel, use a few pieces of newspaper to block the outflow pipe. For this, push the newspapers carefully through the pipe but ensure that you may take it off whenever necessary with ease. So, don’t push it too hard. It blocks the sewer gas from entering the bathroom and home to save you from extremely bad odor and unpleasant feel.
Now, you need to prepare to remove the rusted toilet flange.
- You should scape off the toilet flange’s old wax ring. For this, use a putty knife and remove the wax ring shortly.
- Now, you should see the screws and nuts that hold the toilet flange with the bathroom floor. Since it will have rust, it might not come off easily. Thus, we recommend applying a rust cleaner or regular home cleaner to remove the rust and then securely pry off the screws. You need to turn the screwdriver counterclockwise for this purpose. Usually, 4 screws hold the toilet flange, and you need to replace all of them.
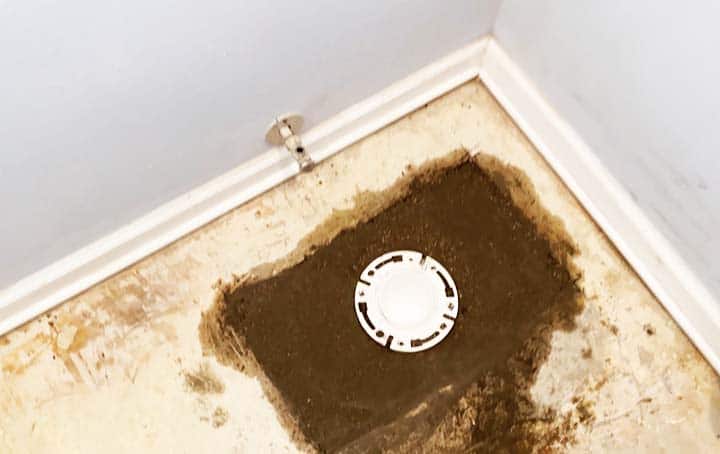
- You can conveniently lift the PVC toilet flange with gasket seals after removing the screws. You can then rinse it off and see if it is repairable or not. If the PVC flange is attached with the outflow pipe using glues, you need to use a chisel to remove the glues and then take off the PVC toilet flange. If the toilet flange is made of cast iron, you are better off calling a plumber for the job.
Step 3: Choose the right toilet flange replacement
Now, it’s time to choose the right toilet flange for replacement. You need to take the old toilet flange to a hardware store for this. Or, you can take a picture of the old flange with your smartphone and use it to purchase the matching toilet flange.
But you should measure the interior diameter of the toilet’s outflow pipe properly first. It will save you from taking the old flange in the store and works as a backup system. Once you have purchased the new toilet flange, get a new wax ring that appropriately matches the flange diameter.
Step 4: Reinstall the new toilet flange
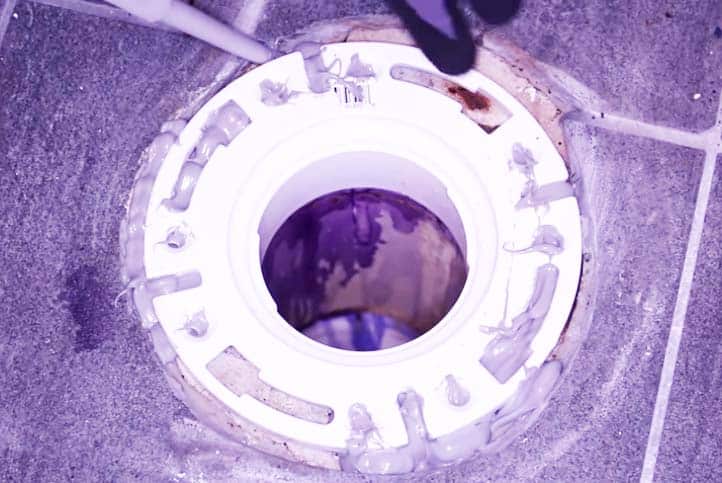
Once you have the new toilet flange at hand, carefully remove the nuts and bolts from it and set them aside. Now, place it right on the existing subfloor of the bathroom. The toilet flange will have 2 channels to secure the nuts and screws.
Carefully position all the screws and tighten them with the screwdriver. Now, you have to push the toilet flange directly towards the outflow pipe to sit perfectly on it. The bolts will feature 3 o’clock and 9 o’clock positions at this setup, indicating that your toilet flange placement is properly done.
The toilet flange neck contains a rubber gasket. It will seal the flange against the outflow waste pipe to stop water and filth leakage from the toilet bowl.
Now, you should drive in all the screws of the new toilet flange through its holds and right on the bathroom floor. Ensure that you don’t damage the bathroom floor in the process. If it gets damaged, you need to repair it, and it can be costly at times.
If the screws of the new toilet flange don’t go through the same holes on the floor, you need to drill the floor to create pilot holes for the new setup. After that, you can secure the toilet flange against the toilet floor.
Finally, remove the old towel from the outflow pipe.
Step 5: Remount the toilet bowl
Before you remount the toilet, tilt it up to install the new wax ring at the bottom opening part. Apply mild pressure to attach the wax ring to the toilet bowl bottom securely. Now, carefully, place the toilet over the newly installed flange.
Make sure you have aligned it perfectly with the two side holes that will hold the screws to keep the toilet in its place. Now, use a wrench to tighten the screws to place the toilet bowl securely. After that, connect the removed water supply hose with the toilet tank. You may then turn on the main water supply line and start using the toilet without worries.
Final Words
Replacing a rusted toilet flange doesn’t need any special plumbing skill. Henceforth, this step-by-step guideline on how to replace a rusted toilet flange quickly and conveniently should be useful for you. It works best for the PVC toilet flanges since these are easy to lift and replace.
However, with a bit more care, you can use it for metal toilet flanges too. The key is to find the right match for the old toilet flange and secure it with the flooring using the screws.
I am James Martin, An professional plumber with more than 16 years of experience. The main purpose of my writing is to share my experiences of helping others. Be with me and explore bathroom plumbing, installation, cleanness ideas, and many more.