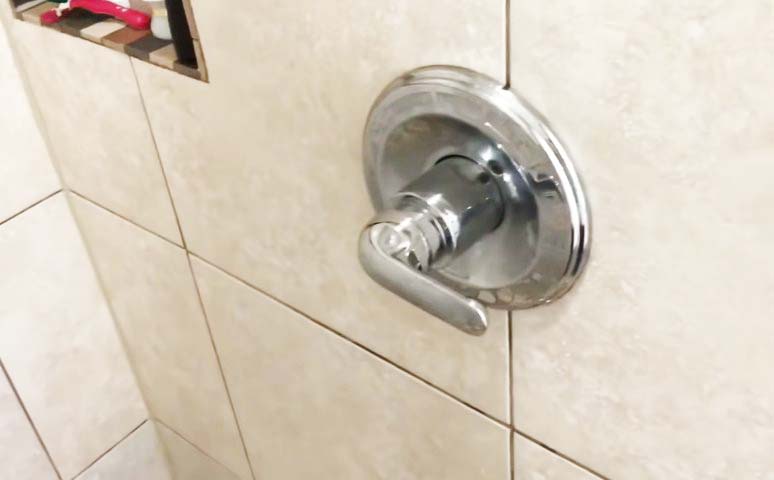
If you pay close attention to the latest shower handle in the market, you will notice that they don’t have visible screws. Though the shower handle with no screws looks sleek and nice but removing it can be quite difficult and tricky.
Your faucet maybe is working fine after installation, but you may need to remove it after a long period due to one or two reasons. Some of the reasons you may need to remove your shower include replacing it, locating and repairing leaks, replacing the faucet cartridge, changing the filter, and lots more.
This guide will be very helpful if you need to learn how to remove the shower handle without screws. Keep reading to learn more.
Why do you need to remove the shower handle?
There are several reasons why you may need to remove your remove shower faucet handle with no visible screws, and some of them are listed below:
- Firstly, you may need to remove the faucet handle if you need to replace a broken or faulty faucet handle with a new one
- Another reason for removing the faucet handle is to change the faucet cartridge
- You will also need to remove it if you need to locate and fix a leak
- Replacing a damaged filter will also require that you remove the shower handle
- And finally, removing the shower handle is necessary when you want to clean the inner parts of the faucet handle.
How to remove the shower handle without screws?
Faucet handles can be divided into single faucet handle and double faucet handle. These two handles are quite different, and the methods of removing the two handles are also different. In this article, we will explain removing the different types of faucets.
Single Shower Handle Without Screws
Follow the steps below carefully to learn how to remove a single shower handle without screws:
STEP 1: Locate the Button or Cap
The shower handle without screws will have a button or a cap. Before removing the faucet handle, you will have to locate the button or cap. It is usually placed on top of the faucet or the side.
STEP 2: Pop out the Cap or Button with a Flat Screwdriver
When you locate the cap or button, you will insert your screwdriver inside the little gap and gently move it around the edge of the gap until you remove the button or cap. Note that some of these faucet handles are very delicate, so you need to handle them with care.
STEP 3: Turn Off your Water Supply
If you want to change the cartridge inside the faucet, you must turn off your water supply.
STEP 4: Remove the Screw
After you have turned off your water supply, the next thing you need to do is to remove the screws. To know the right wrench for loosening the screw, you will have first to determine the size of the screw.
To prevent the screw from falling inside the drain, you may also close the drain or cover the drain with a cloth before you start removing the screw.
STEP 5: Remove the Handle
Now that you have removed the screws, the next thing you need to do is to pull out the shower handle. You may try pulling the handle with your hands. If you cannot pull it out with your bare hands, you will need to use a faucet handle puller or a pair of pliers. We recommend that you not use the pliers directly because they may scratch your faucet handle. The best thing to do is wrap a towel around the base of the faucet handle before using the pliers.
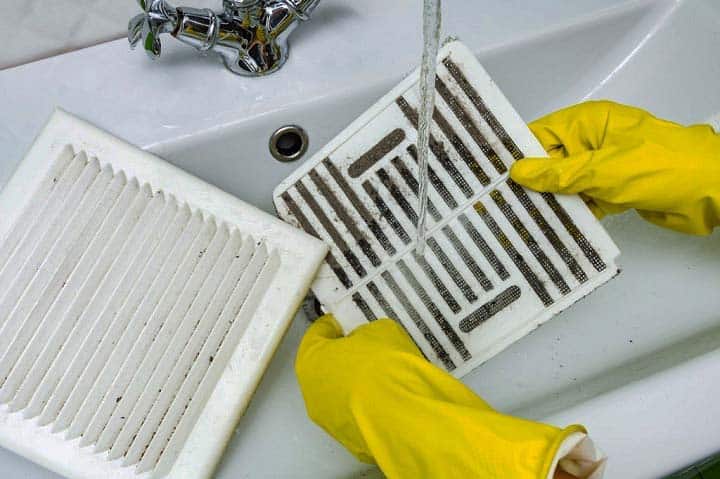
You may need to do a little cleaning after removing the faucet handle. Lemon or distilled white vinegar will help to get rid of mineral deposits. After cleaning the dirt and replacing the damaged parts, the next thing to do is reassemble the parts you have removed. To avoid the loss of components, make sure you keep the disassembled components in a safe place.
Double Faucet Handles Without Screws
STEP 1: Turn Off your Water Supply
This method is quite different from the first one, so the first thing you need to do is to turn off your water supply.
STEP 2: Turn the handle’s base
To remove the handle’s base, you will have to hold the faucet’s handle arm and twist the handle’s base in an anticlockwise direction. Ensure that you do not twist it in the wrong (clockwise) direction so that you will not break the handle’s base.
STEP 3: Remove the Screw
When you remove the faucet base, you will see a screw. You will use your screwdriver to remove the screw.
STEP 4: Pull Out the Faucet Cartridge
Once you remove the screw, you will see the cartridge underneath. Carefully check the cartridge to see if it is damaged or not. If the cartridge is damaged, you will have to remove and replace it. A nose needle plier will help to remove the cartridge easily.
STEP 5: Reassemble the Components
After cleaning the dirt and replacing the damaged parts, you will reassemble the components back the same way you met them.
How to Remove a Lever Style Faucet Handle Without Cap or Screws?
This faucet handle is completely different from the two types we’ve listed above. Also, removing it is quite different from other types of faucet handles. The method of removing it is listed below:
Remove the Button
First, you need to note that this faucet handle is very delicate, so you need to handle it carefully. The lever-style handle has two buttons; the hot and the cold buttons. Carefully remove the buttons with your flathead screwdriver.
Remove the Allen Key
This faucet handle doesn’t have a screw but an Allen key. Remove the Allen key with your Allen wrench.
Pull Out the Faucet Handle
After removing the Allen key, you can pull out the faucet handle. Removing the faucet handle will expose the cartridge, and you will be able to access it and replace it if it is damaged.
Frequently Asked Questions (FAQs)
- What can I use to get rid of mineral deposits in the faucet handle?
Distilled white vinegar or lemon is used to get rid of mineral deposits in the faucet handle.
- What can I use to pull out a hard shower handle?
You can pull it out with a pair of a plier or a faucet handle puller.
- What is the function of the faucet cartridge?
The function of the cartridge is to control the flow of water.
- How do I remove the base of a double faucet handle?
You will remove it by twisting it in an anticlockwise direction.
Conclusion
There are different types of faucet handles without screws, and removing each of these handles is different from each other. So, before you start removing a shower handle, you need to understand the method of removing it.
Shower handles without screws may look beautiful but may be difficult to remove if you try them first. To remove your shower faucet handle with no visible screw without stress, you may need first to study how to remove the shower handle without screws.
This article contains three different methods of removing shower handles without screws.
I am James Martin, An professional plumber with more than 16 years of experience. The main purpose of my writing is to share my experiences of helping others. Be with me and explore bathroom plumbing, installation, cleanness ideas, and many more.
Pingback: 3 Ways to Fix a Bathtub Faucet That Won't Turn Off